The Trade Modification Warning message screen will be displayed, as below.
Click OK.
The Trade New screen will be displayed, as below.
Enter the Entity from the options using the drop-down box.
Enter the Trade Type from the drop-down box.
Enter the Trade Source e.g. MAT.
Enter a new unique Trade Ref.
Enter the Stock – enter the amount of shares.
Enter Cash – enter cash consideration. Leaving this field blank will not stop the trade from being created but may have other processing impact.
Select Settle Ccy – enter currency that trade was booked and settled with, from the drop-down box.
Enter the External Ref – The Trade reference which will be recognised by external parties. This could be the same as the Trade Ref.
Enter the Trade Date – enter date of trade. If trade is to form part of a Corporate Action event then relevant dates will need to be added.
Enter the Settle Date – enter date of intended settlement. If trade is to form part of a Corporate Action event then relevant dates will need to be added.
Enter the Close Date – enter the date that the trade actually settled/closed.
If trade is to form part of a Corporate Action event then relevant dates will need to be added.
Enter Conditions from the drop-down box OR this can be left blank.
Leaving this field blank will not stop the trade from being created but may have other processing impact.
Enter Front Office Book – choose the relevant book that the trade was booked on. User may need to check in relevant trading/settlement system.
Leaving this field blank will not stop the trade from being created but may have other processing impact.
Enter Back Office Book – leaving this field blank will not stop the trade from being created but may have other processing impact.
Enter Depot – enter the relevant depot code e.g. 22449.
Enter Lend Rq Rate – enter the dividend rate as per trade booking e.g. the dividend rate that will be used to calculate any cash dividends within an event.
Enter Trade Source from the drop-down box.
Enter the Ref from the drop-down box e.g. Isin, select Lookup and continue below OR
The user can enter code in the field next to Ref and then select Lookup – a pop will then detail any codes connected with the entered number.
The user can then highlight the relevant row and choose Select.
The following fields, Name, Mkt, Isin and Id will then be automatically populated.
The Which Instrument? screen will be displayed, as below.
Select the row you want to use.
Click Select.
The Trade New screen will be displayed, as below.
Enter in Trading Party Type B or C, depending whether the trading party is a Book (B) or Counterparty (C).
Enter Trading Party Id – enter relevant code.
Enter in Counterparty Type B or C, depending whether the trading party is a Book (B) or Counterparty (C).
Enter relevant code in Counterparty Id.
Click Save.
To complete the posting the settlement needs to do be done for the same trade.
From CATS Main Diary page.
Select Ref Search.
Select Find Trade.
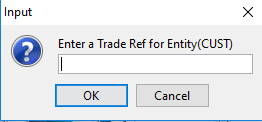
The Input screen will be displayed, as below.
Enter a valid Trade Ref for Entity(CUST).
This is the trade reference that was used and entered in the previous steps.
Click OK.
The Trade screen will be displayed, as below. Please Note: If there are no trade/settlement postings, the trade would not feed into any relevant event at this stage.
Select New Posting.
The Posting New screen is displayed, as below.
The IdEntity, TradeRef and IdDepot fields will have populated automatically.
Select the required IdPostingType New Trade Posting from the drop-down box.
If no postings exist, then user should select New Trade Posting as the first step.
Enter relevant date in DtValue.
Please Note: If trade is to form part of a Corporate Action event then relevant dates will need to be added.
Enter relevant trade amount in AmountStock. Normally this would be the same amount as the original trade amount.
Enter the relevant cash consideration amount in AmountCash.
Leaving this field blank will not stop the posting from being created, but may have other processing impact.
The DtUpdate will automatically update.
Please note: The format of the date and the time entered. This should be the current date but if testing then enter a date before the UAT testing system date
e.g. if UAT shows 13th June 2017 then make sure this date is before 13th June 2017.
Click Save.
The user then has to repeat the same steps and complete the Settlement Posting.
From the Id Posting Type box, select Settlement Posting from the drop-down list.
This will then enter the trade into the relevant event, IF the correct dates have been entered.
Please note: The Supervisor must then validate the relevant trade.
From the main CATS Diary page.
Select Validation.
Select Validate Non-CA Modifications.
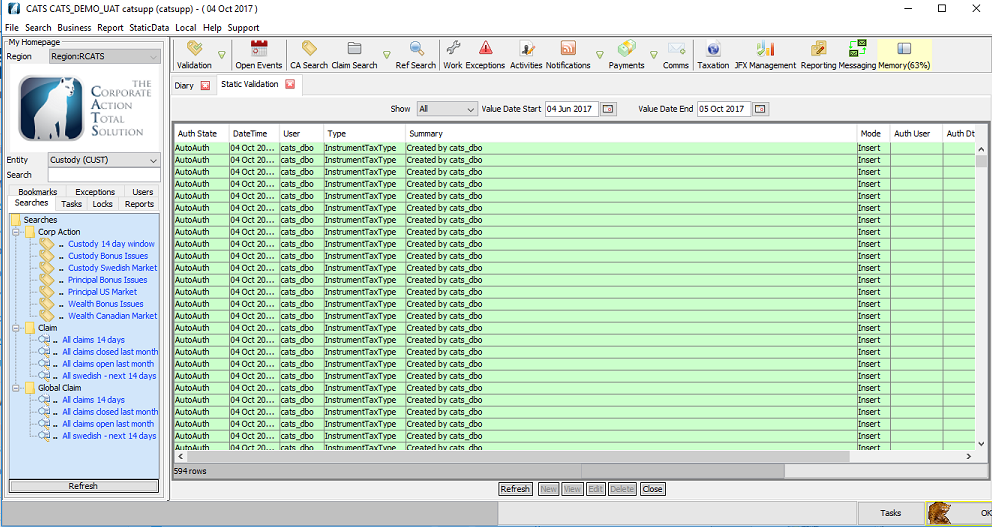
The Static Validation screen will be displayed, as below.
The Trade is shown below shows trade that only has the New Trade Posting completed and approved.
Please note: The screen above shows the New Trade Posting was approved before the user entered the Settlement Posting.
Users can do both postings at the same time before getting approval OR do 1 at a time.
The Trade screen below shows trade has both Postings completed and approved.
How to Edit an Entitled Depot Position
Users can also update DPT or DPO from the CATS CA File.
Select Entitlements.
Double click the relevant row.
The Entitlement Position screen will be displayed, as below.
Select Adjust from the top row.
Then selecting one or more of the options given – depending on option selected, will give rise to the position appearing in the entitlement screen or not.
Please note: The Supervisor must then validate the changes.
How to Edit an Entitled Depot Position
FROM THE CATS CA FILE
Users can also update DPT and DPO from the CATS CA File.
Click the relevant row.
Click Goto.
Select Item.
The Entitlement Position screen will be displayed, as below.
Click Close to return to the CATS CA file.
How to Add a New Trade
FROM WITHIN THE CATS CA FILE
Note: The CATS CA file must be locked.
To add any override, the CATS CA File must be locked to that user.
Ensure the file is locked to you. If not locked press the Lock button at the top of the CA File screen, as below.
File screen, as below.
Select Entitlements.
Select Override.
Select Create Missing Position(NEW).
The Create new position screen will be displayed, as below.
Select Trade from the drop-down box.
The Trade screen will be displayed, as below.
Select the appropriate option from the Select Holding Type drop-down box.
Select (In this case) Open Buy from the Select Holding Type drop-down box.
Enter the unique to CATS Trade Ref.
Enter the relevant Transaction Ref.
Enter the Lending Rate - Optional for Buy/Sells.
Enter the relevant Amount.
Enter the relevant Depot Code or Depot Name.
Select Find.
Highlight the relevant Depot row.
Click Select.
Enter the relevant Client Code or Client Name.
Select Find.
Highlight the relevant Client row.
Click Select.
Enter the relevant Counterparty Code or Counterparty Name.
Select Find.
Highlight the relevant Counterparty row.
Click Select.
Select Create Position.
The Confirmation Pop Up screen will be displayed, as below.
Select Yes to create a trade or
Select No if you wish to void or cancel it.
The Trade Created screen will be displayed, as below.
Click OK.
How to Add a New Depot
FROM WITHIN THE CATS CA FILE
Note: The CATS CA file must be locked.
To add any override, the CATS CA File must be locked to that user.
Ensure the file is locked to you. If not locked press the Lock button at the top of the CA File screen, as below.
Select Entitlements.
Select Override.
Select Create Missing Position(NEW).
The Create new position screen will be displayed, as below.
Select Depot from the drop-down box.
The Depot screen will be displayed, as below.
Enter Position Value.
Enter the relevant Depot Account Code or Depot Account Name.
Select Find.
Highlight the relevant Depot row.
Click Select.
Enter the relevant Owner Account Code or Owner Account Name.
Select Find.
Highlight the relevant Client row.
Click Select.
Click Create Position.
The Confirmation Pop Up screen will be displayed, as below.
Select Yes to create a trade or
Select No if you wish to void or cancel it.
The Trade Created screen will be displayed, as below.
Click OK.
Go back to the entitlement screen and the depot will appear on the depot screen, once the file has reprocessed.
Click Reprocess button.
The processing task % bar will appear and then disappear when completed.
How to Add a New Position
FROM WITHIN THE CATS CA FILE
Note: The CATS CA file must be locked.
To add any override, the CATS CA File must be locked to that user.
Ensure the file is locked to you. If not locked press the Lock button at the top of the CA File screen, as below.
Select Entitlements.
Select Override.
Select Create Missing Position(NEW).
The Create new position screen will be displayed, as below.
Select Position from the drop-down box.
The Position screen will be displayed, as below.
Enter the relevant Position Value.
Enter the relevant Depot Account Code or Depot Account Name.
Select Find.
Highlight the relevant Depot row.
Click Select.
Enter the relevant Owner Account Code or Owner Account Name.
Select Find.
Highlight the relevant Client row.
Click Select.
Click Create Position.
The Confirmation Pop Up screen will be displayed, as below.
Select Yes to create a trade or
Select No if you wish to void or cancel it.
The Trade Created screen will be displayed, as below.
Click OK.
Go back to the entitlement screen and the depot will appear on the depot screen, once the file has reprocessed.
Click Reprocess button.
The processing task % bar will appear and then disappear when completed.